The digital marketing agency industry is highly competitive. Without a strong online presence, including your agency website, your digital agency can be at a significant disadvantage.
If you want to recover from your considerable disadvantage and attract potential clients, your digital agency needs a website that showcases your expertise and sets you apart.
And for that, you don’t need to spend extra time or be a coding expert to create your digital marketing website. This is where HostBet Website Builder steps in.
To create your website, you need both a domain name and web hosting. HostBet offers affordable web hosting plans that include both!
See how easy it is to buy web hosting and a domain with HostBet! Checkout- Web hosting and a Domain
Let’s Start To Create a Digital Marketing Agency Website Without Coding.
Want a visual guide for creating a website? Check out our video on How to Create a Digital Marketing Agency Website Without Coding
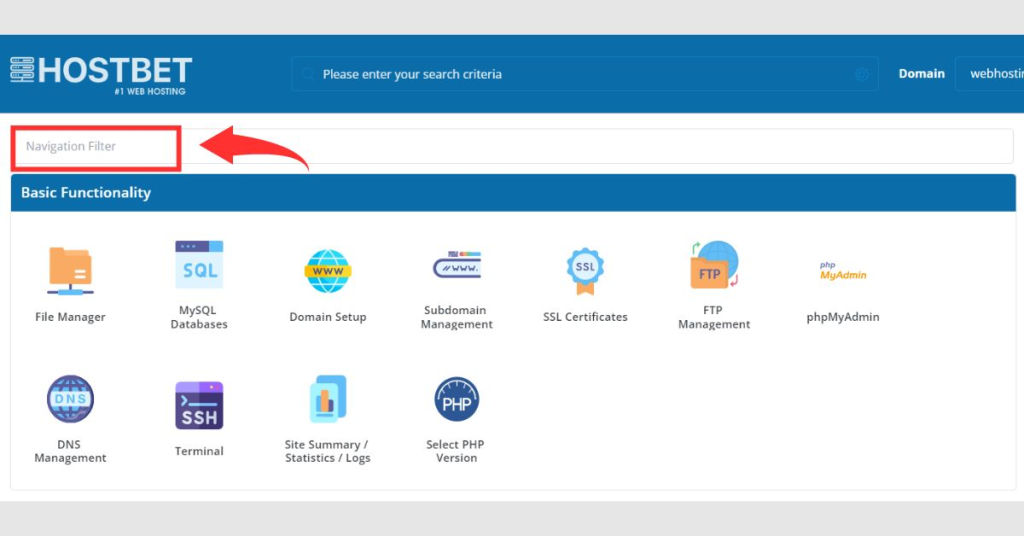
Step 1: Create a digital marketing agency website without coding or spending extra time. Simply search for “HostBet Website Builder” in your search box on the DirectAdmin Dashboard and get started effortlessly.
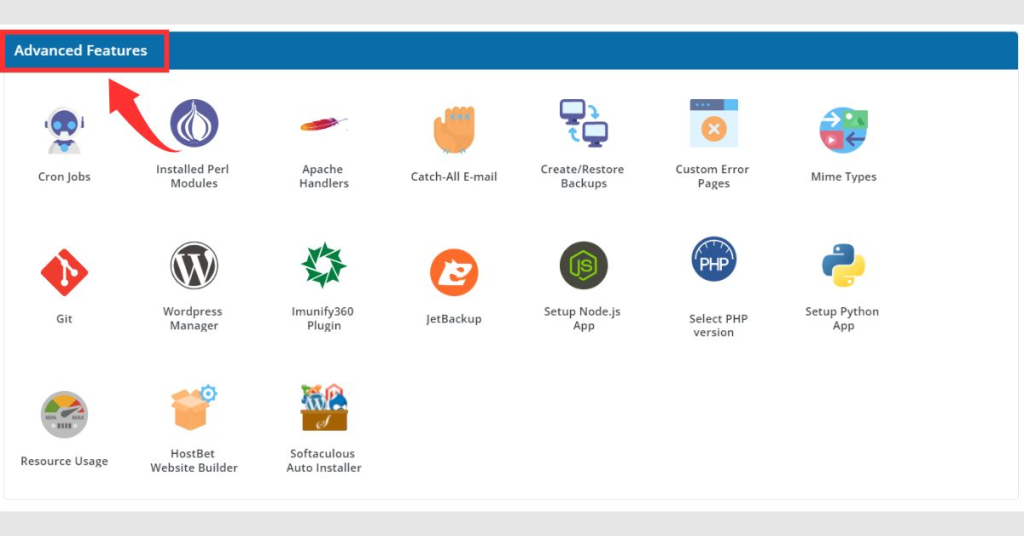
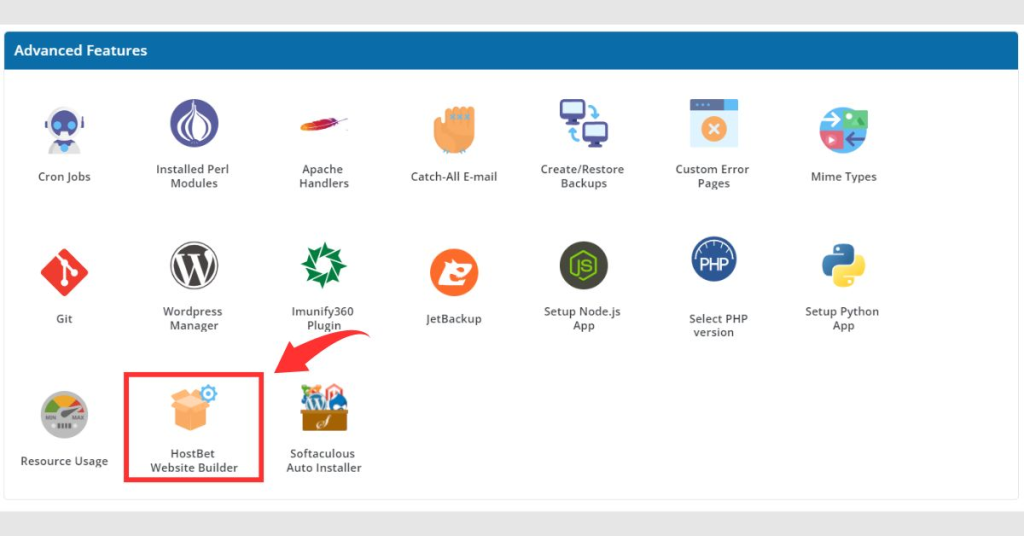
Alternatively, you can locate the HostBet Website Builder within the “Advanced Features” section of your DirectAdmin panel.
Step 2: Once you locate the “HostBet Website Builder,” click on it, and you’ll be redirected to the website builder page
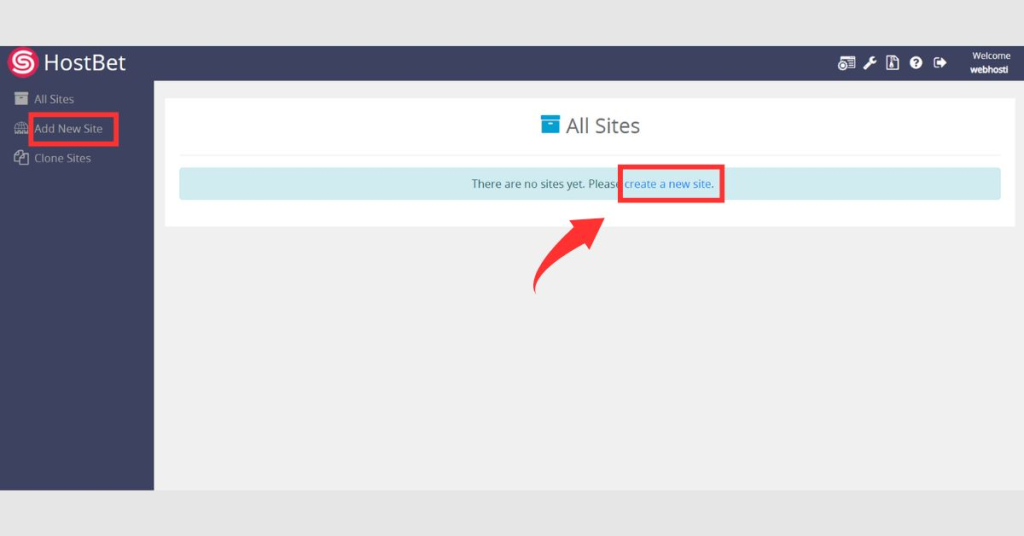
Step 3: Here, you will see the two options for creating a site: “Add a New Site” or “Create a New Site.” Click on either to create a website.
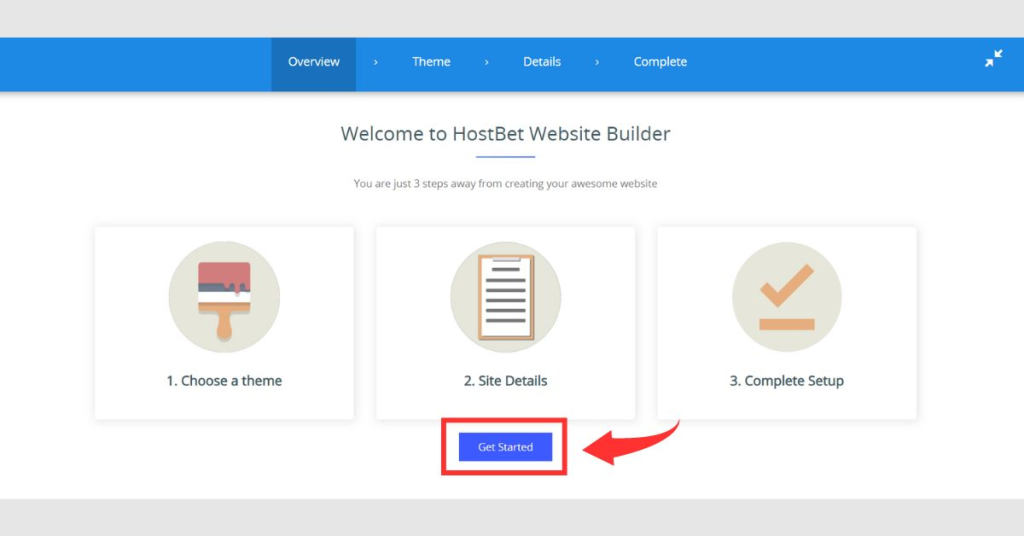
Step 4: Click “Get Started” to open the theme dashboard.
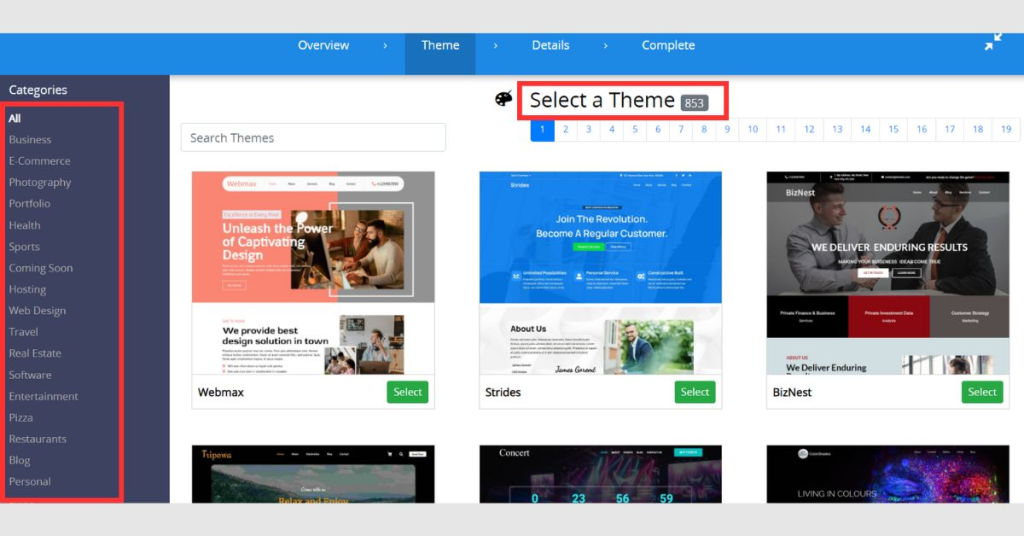
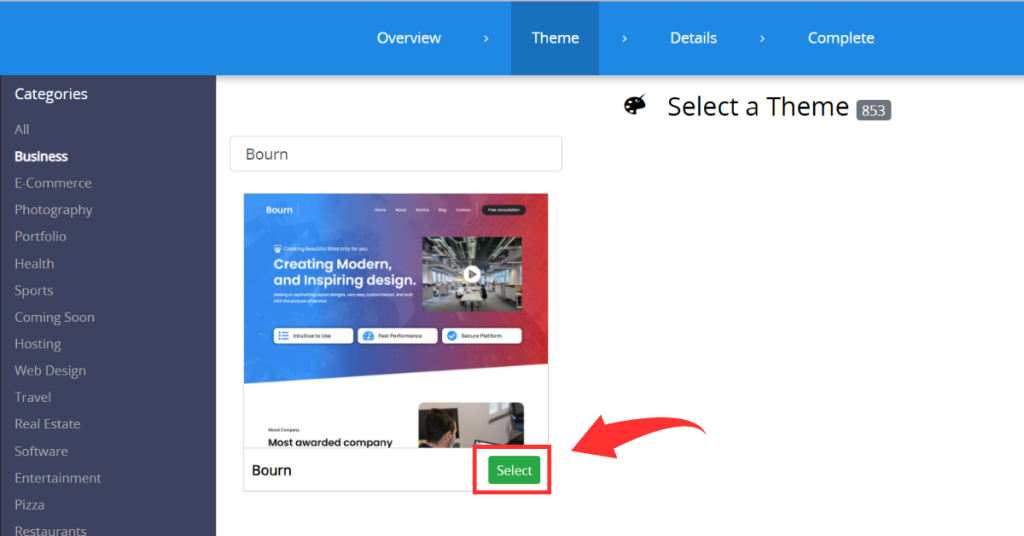
Here you’ll find over 853 responsive themes available at our website builder. You can easily choose one that perfectly suits your niche.
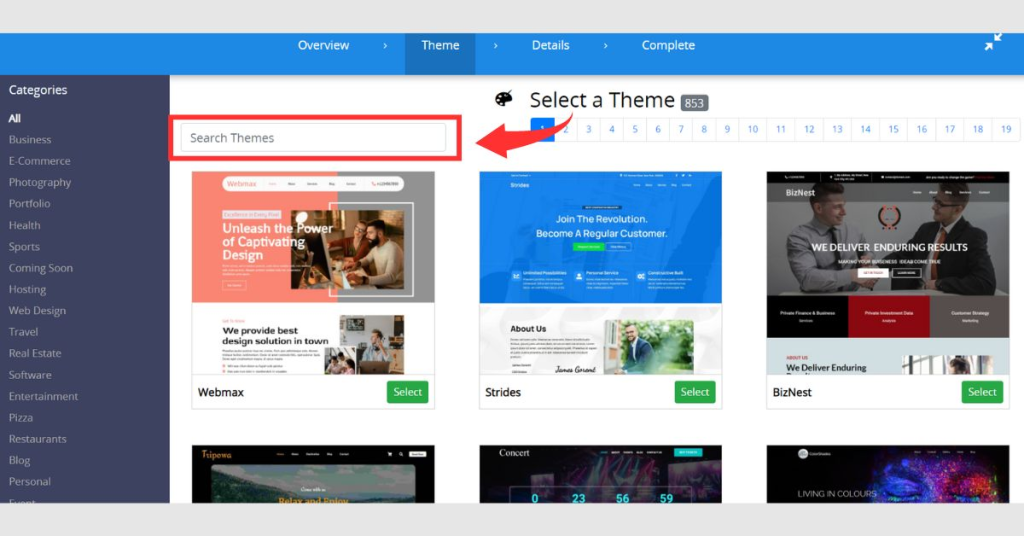
Step 5: We’re creating a website for a digital marketing agency, so we’ll naturally use a theme related to marketing, SEO agency, or consulting. So we search for the digital marketing-related theme name in the search box that we want to use for my website.
Step 6: Once you’ve found the perfect theme for your website, click the ‘Select’ button.
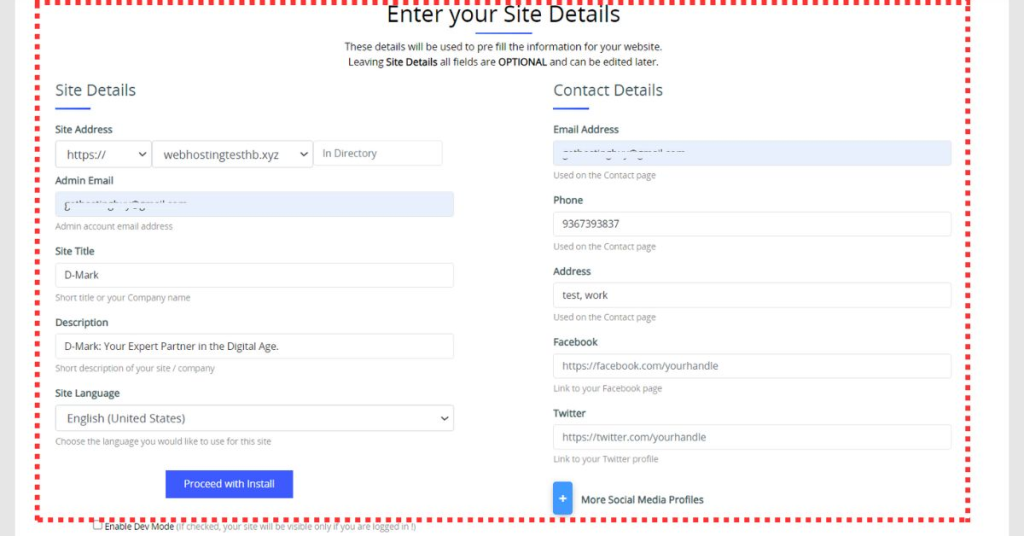
Step 7: Here, you need to provide site details like address, email, phone number, title, and description. (in the directory, leave it blank). Click “Proceed with Install” once you’re finished.
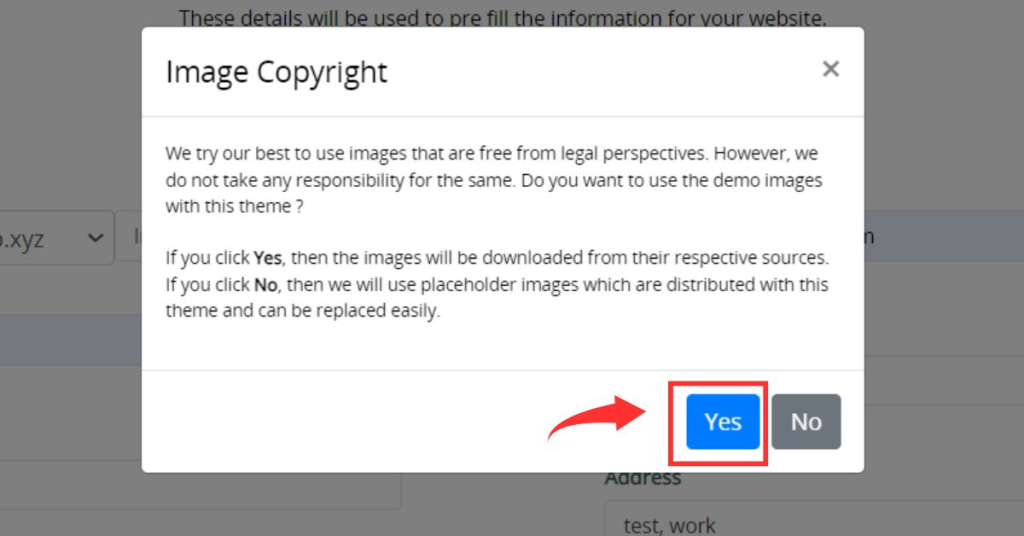
Step 8: Then, a pop-up message will open. Please take a moment to read it before making your choice.
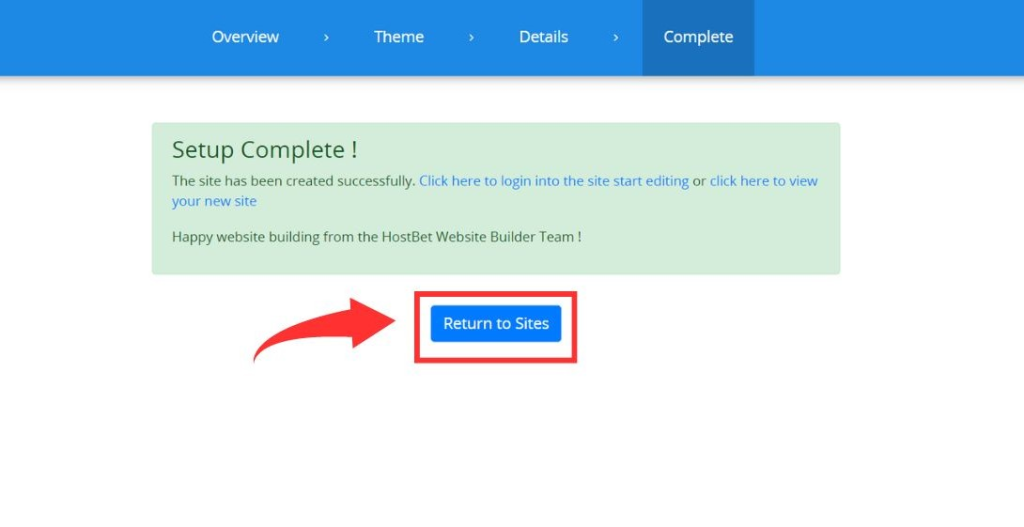
Step 9: Congratulations! You’ve completed the process of creating your website.
You now have two options:
- Click here to log in to your site and start editing.
- Click here to view your new site.
To customize your website, click “Return to Sites” to access the SitePad themes dashboard. Here, you can view your installed themes and make customizations.
Before you begin customizing your dream website, just visit the site itself to identify the elements of the theme you want to change.
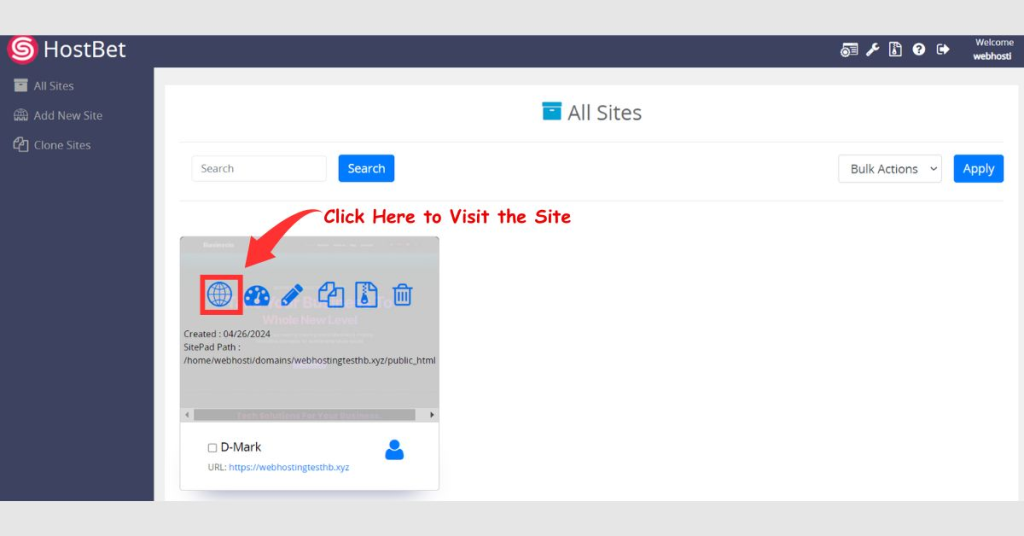
Step 10: Hover over the theme you want to customize and click on “login to the site”.
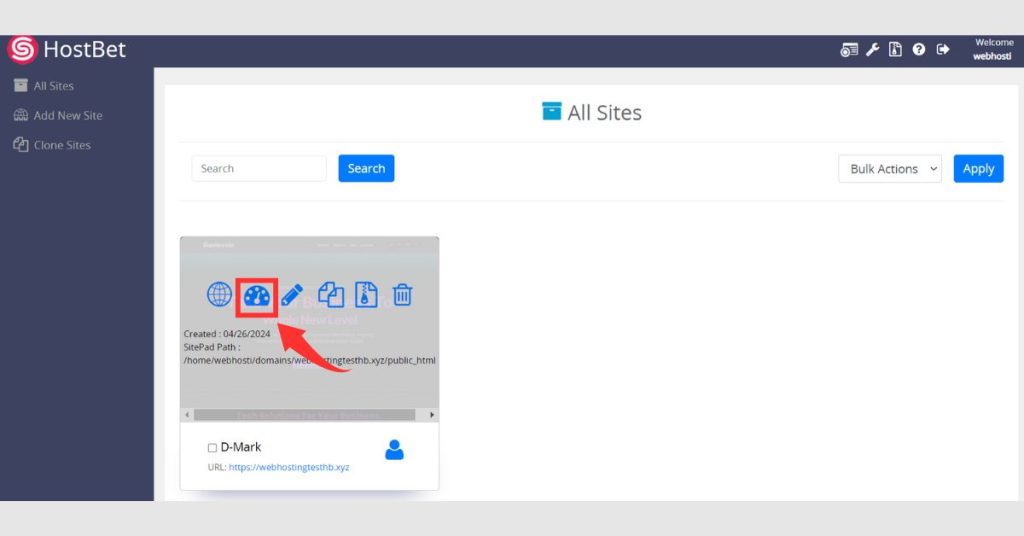
Before starting to customize the theme, you need to understand the sections of the theme to ensure you can navigate the customization process without any hustle.
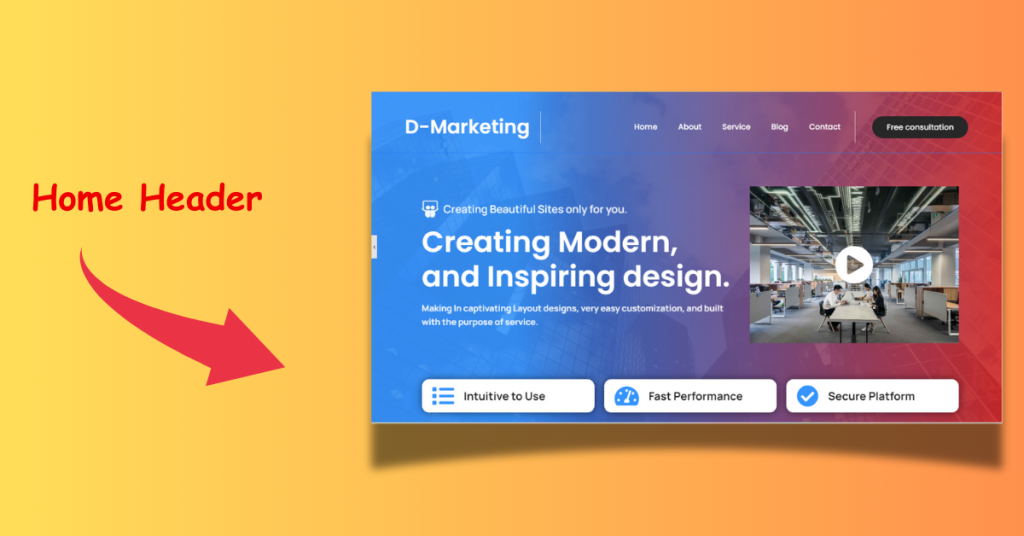
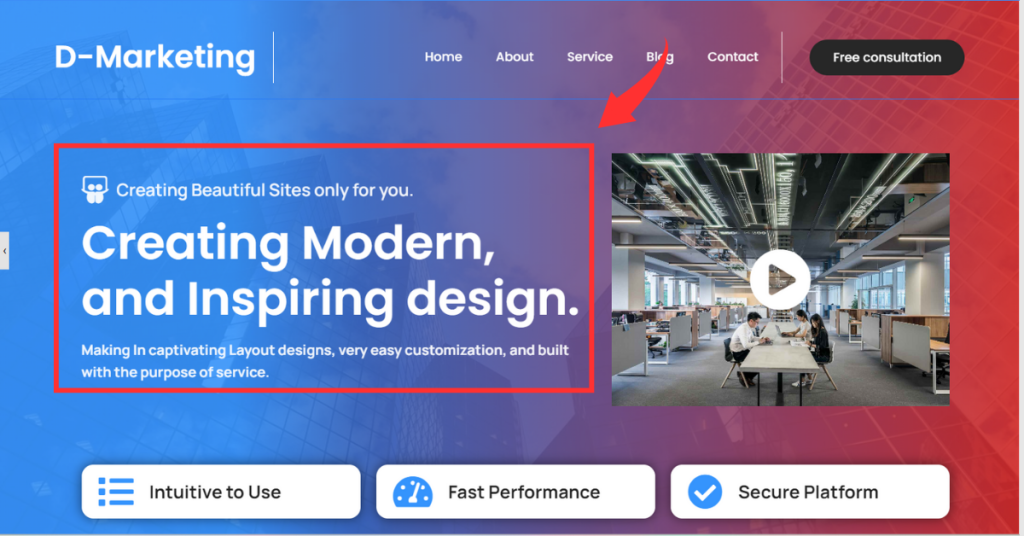
The section in the screenshot is called the home header. This includes all your menu, logo, video, and heading text.
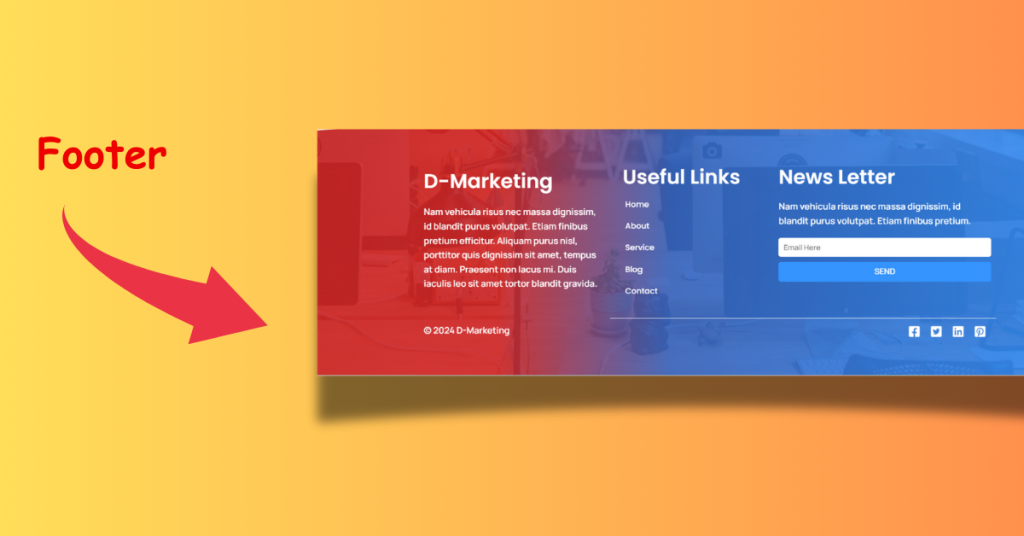
The section in the other screenshot is called the footer. This includes the company description, footer menu, and news later.
The part between the header and footer is called the home page.
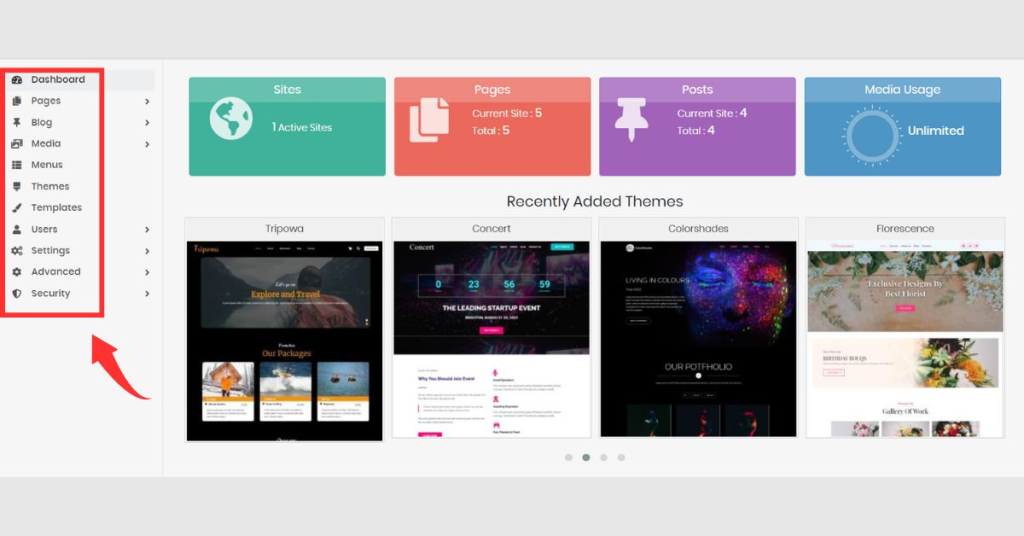
Step 11: Here, you’ll see various options like settings, blog, media, menu, themes, templates, security, and more.
Step 12: First, customize the below heading sections of our website.
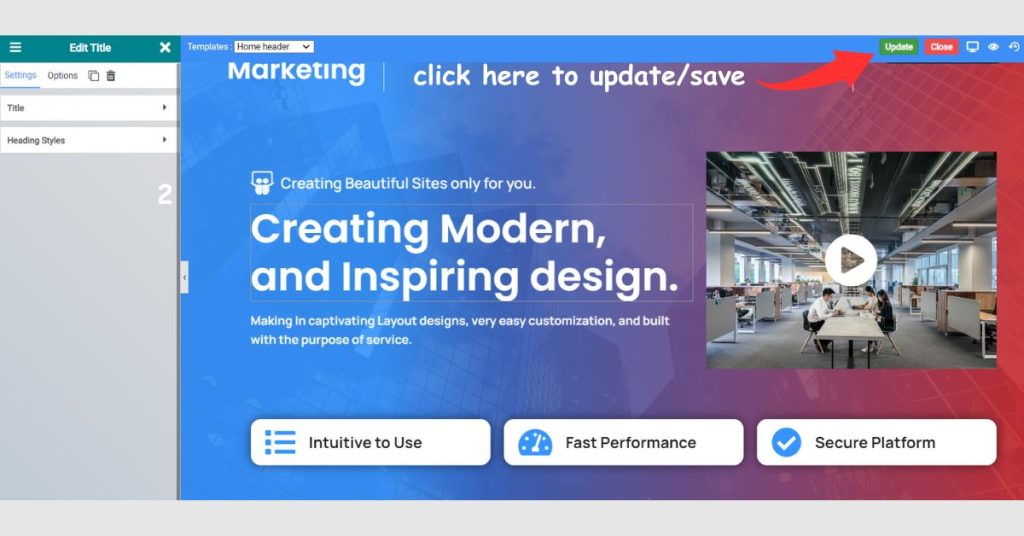
Remember to update your changes after editing. Otherwise, your modifications won’t be reflected.
Step 13: To customize heading sections, click on the template options.
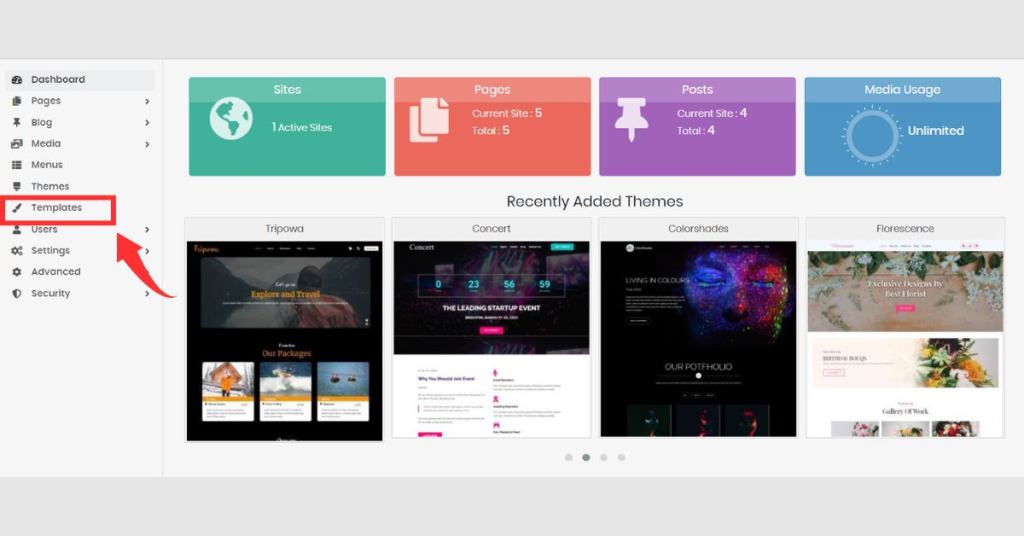
Step 14: Clicking this will redirect you to the Pagelayer Templates dashboard. where you can edit your site’s header, footer, blog template, single post template, and 404 page.”
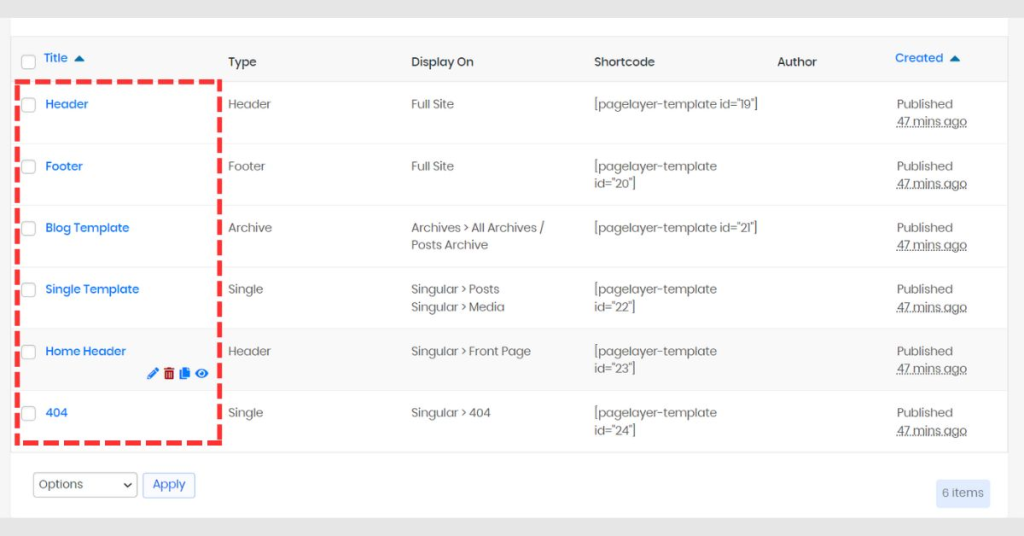
Step 15: To customize your heading sections, Just click on “Home Header.” As we explained above
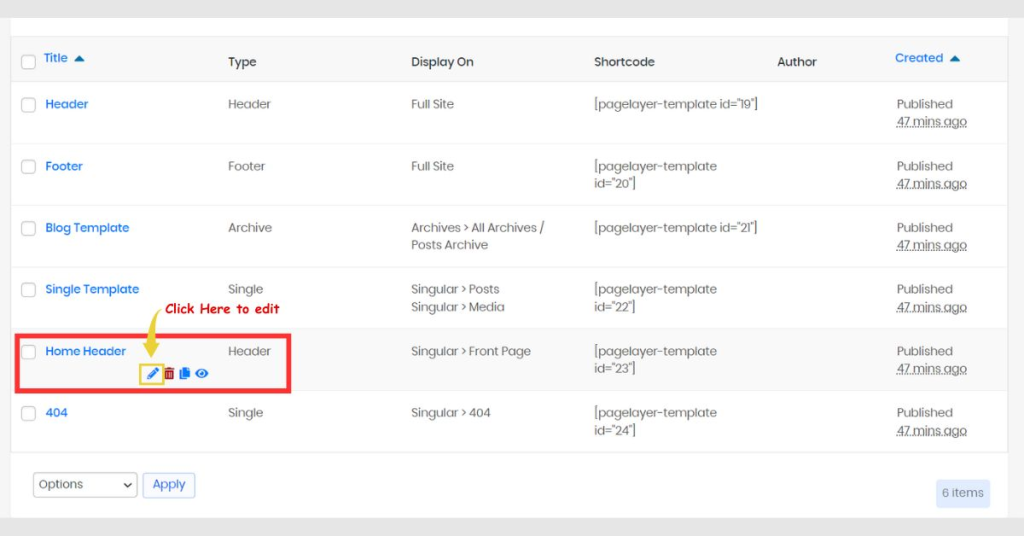
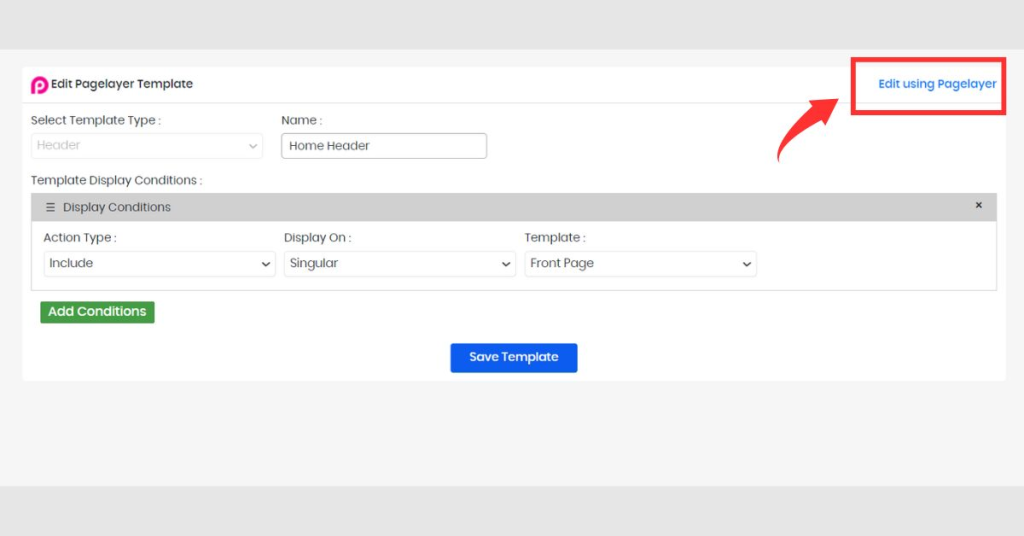
Step 16: Clicking this will redirect you to the Pagelayer Template Editor. Click on “Edit using Pagelayer.”
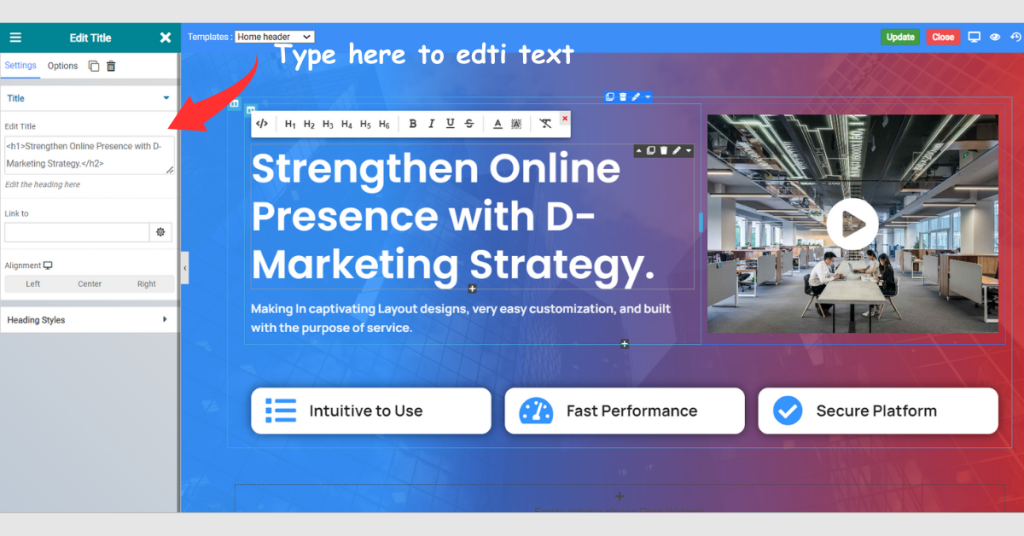
Step 17: To edit this heading text, “Creating Modern and Inspiring Design,” and other text in the home header section, select the text and click on “Title.”
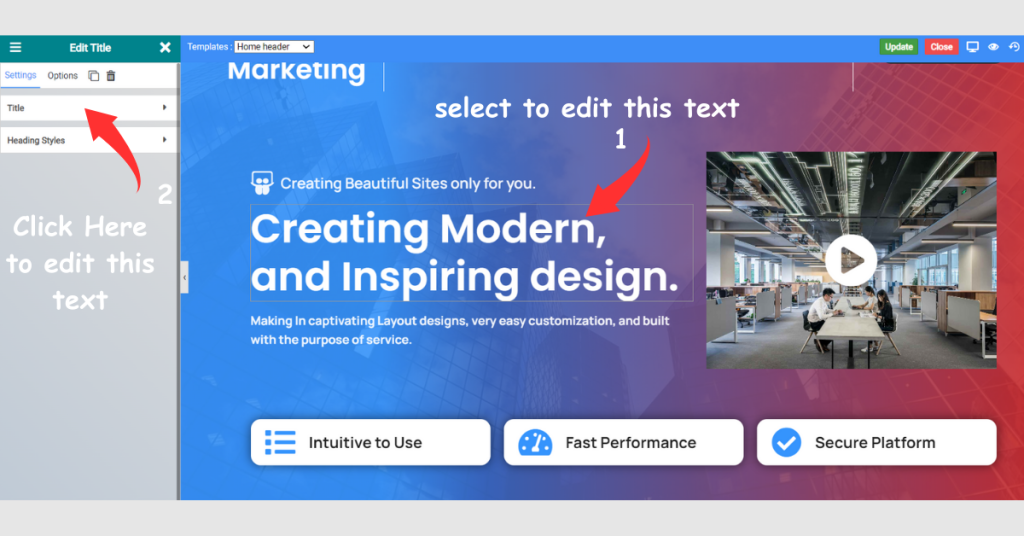
Step 18: Here we have changed the text “Creating Modern and Inspiring Design” to “Strengthen Online Presence with D-Marketing Strategy.” Similarly, you can edit all the text in this section.
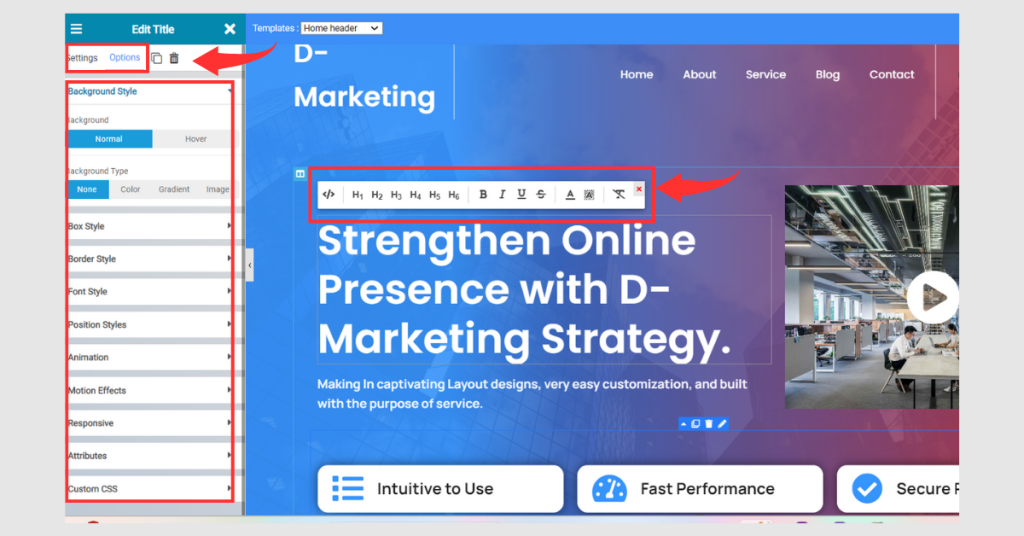
Step 19: You can edit anything in this section, including box style, background style, border style, font, color, text animation, and converting normal text into headings like H1, H2, H3, and more. Selecting “settings and options”
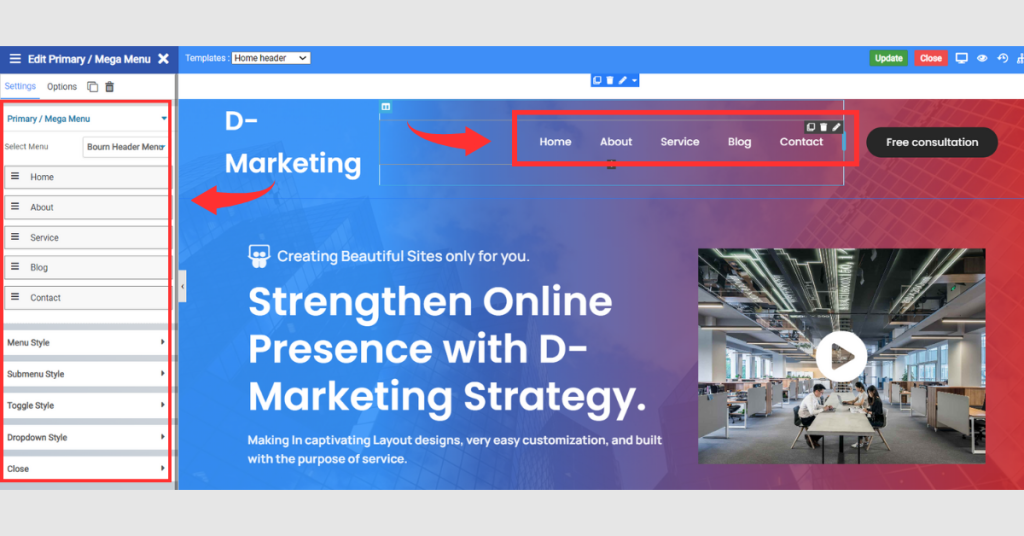
Step 20: Similarly, you can edit your home page menu directly from the home header
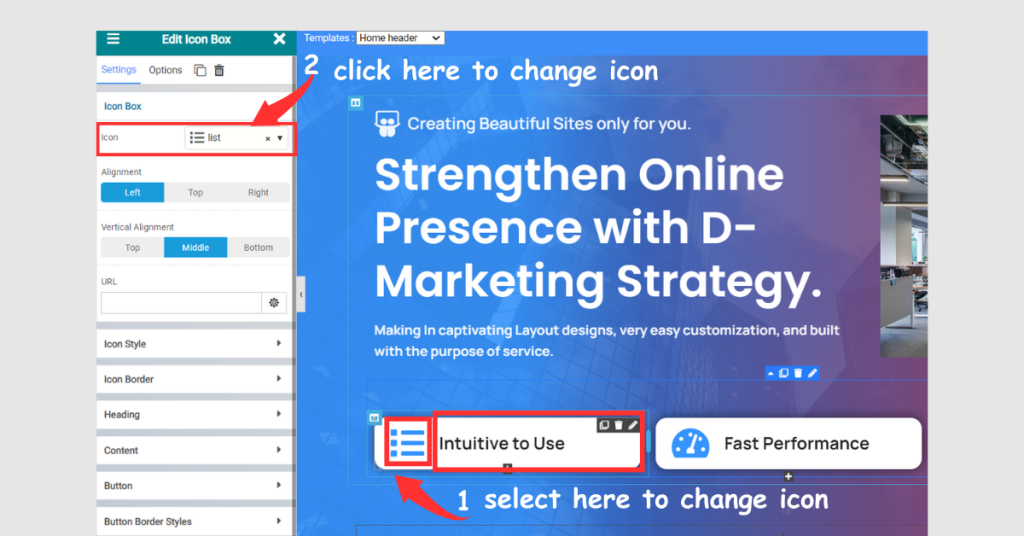
Step 21: Next, here’s how to edit our digital marketing agency’s website widget. Simply, click on the specific widget you want to edit.
You can edit anything in this widget section, like “heading text.” You can easily change the icon in this widget section by clicking on the icon option.
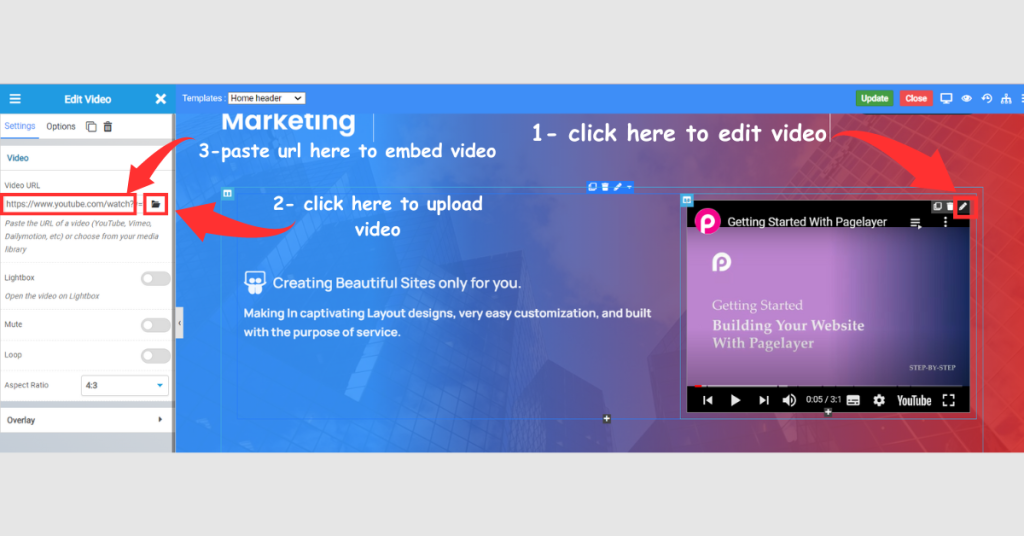
Step 22: You can also edit video sections by either pasting the URL of a video (YouTube, Vimeo, Dailymotion, etc.) or choosing a video from your media library.
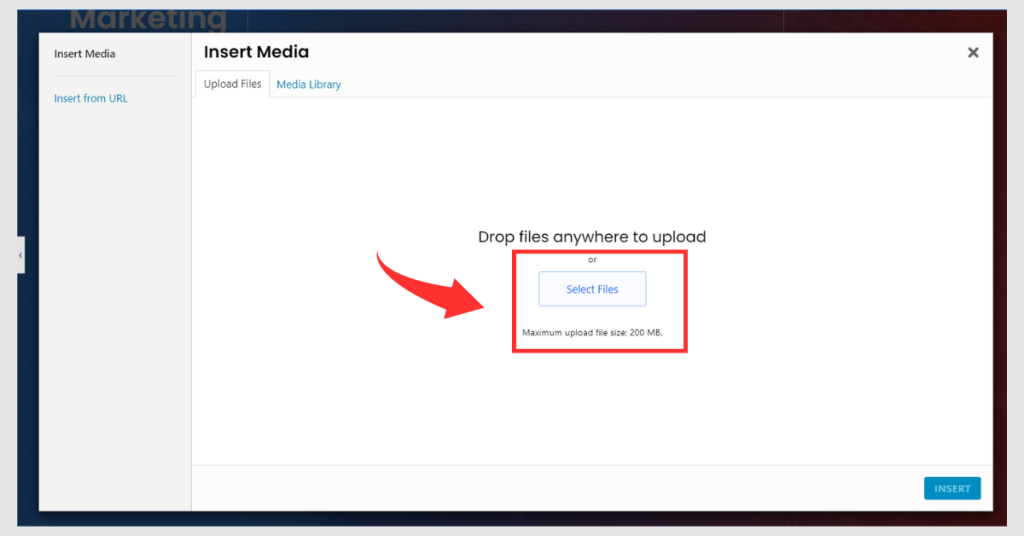
Step 23: To upload the video, click on Select Files.
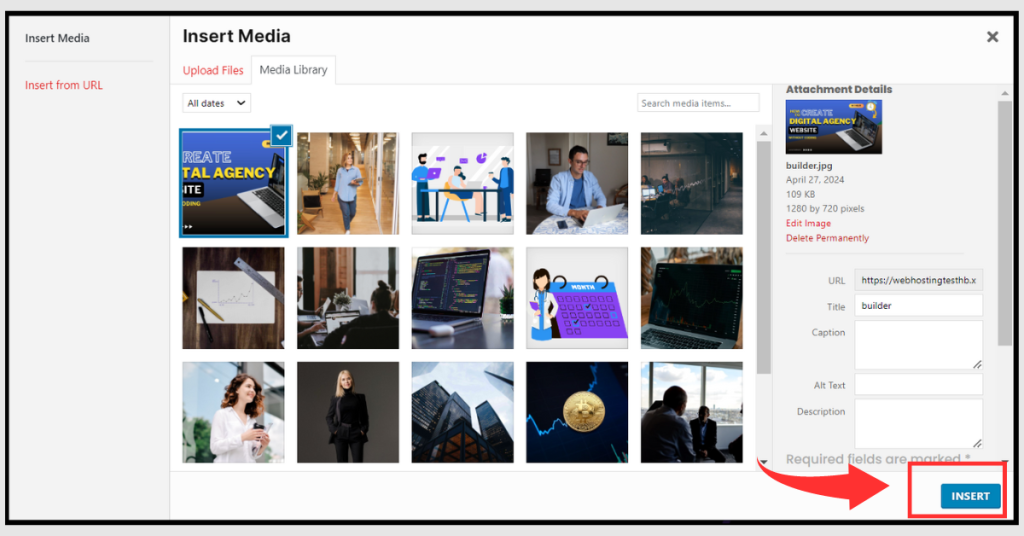
Step 24: Once you’ve uploaded the video, select it and click “Insert” to add it to your content.
Step 25: After editing the “Home Header,” (you need to customize the home page. )return to the Dashboard. Click on “Pages” and select “All Pages” from the menu.
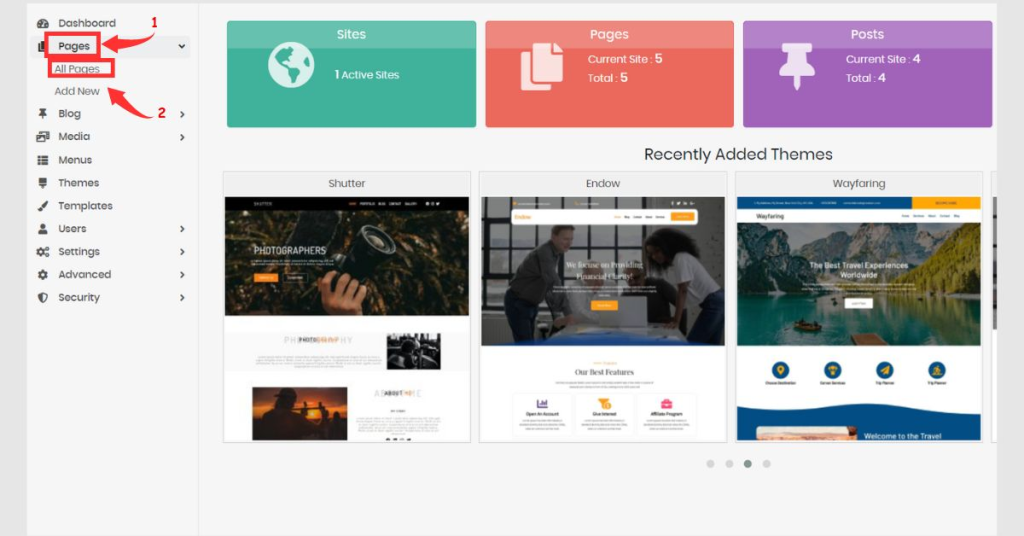
Here, you can see all the pages of your website, like the blog, about, contact, and home.
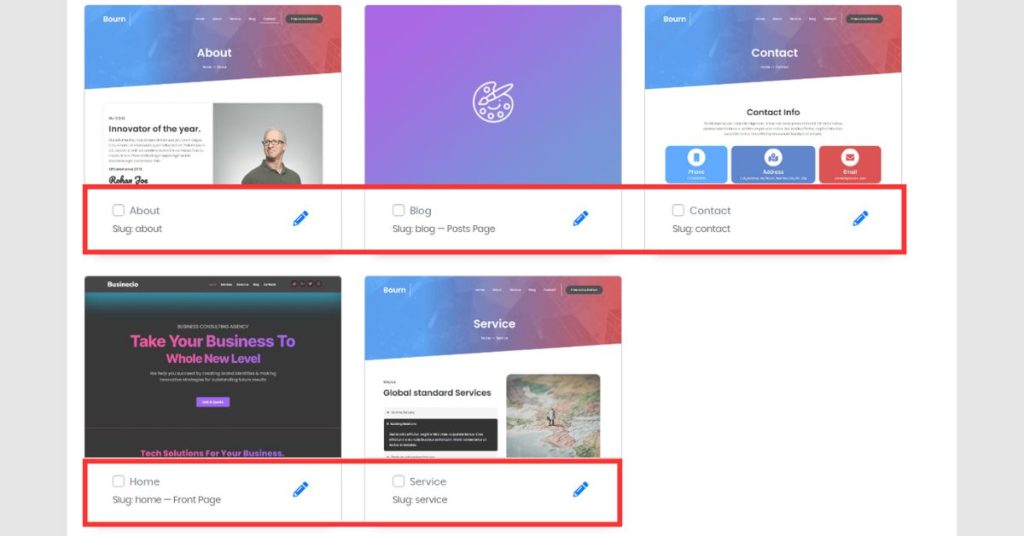
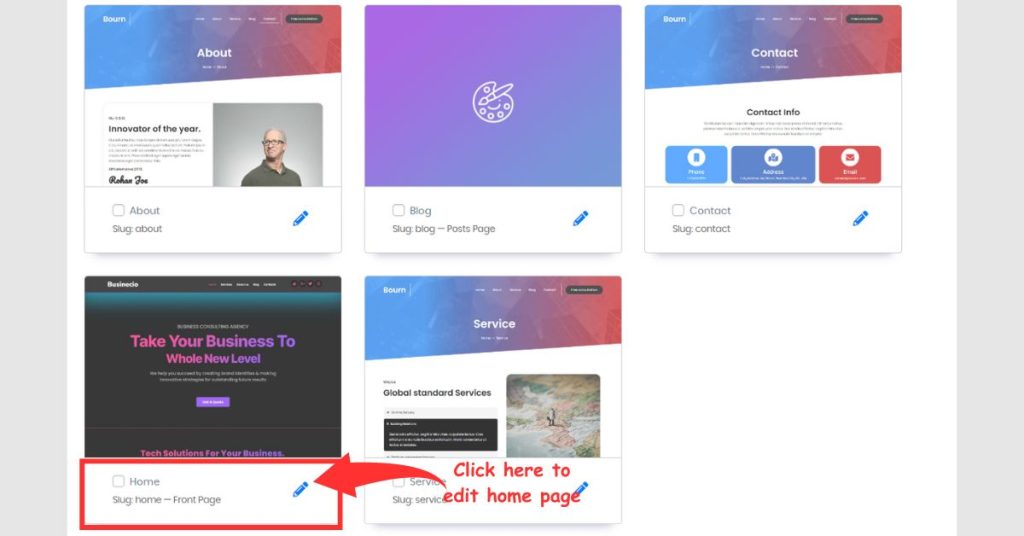
Step 23: Click on “Home Page” to customize the content of your home page.
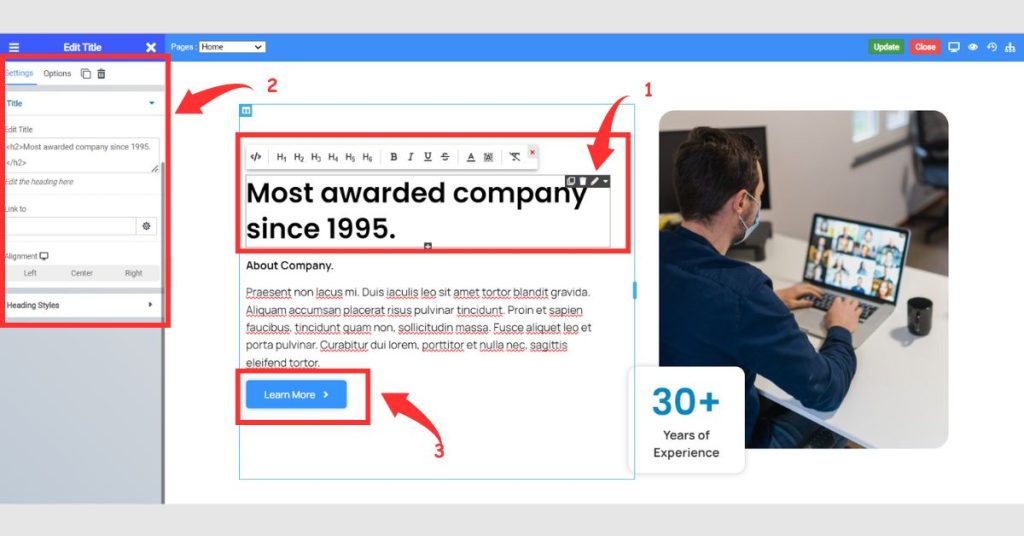
Step 24: Similarly to the home header title text, you can edit the title or description by selecting the “Text” or “Title” option from the setting.
- You can also edit anything in this section, including box style, background style, border style, font, color, text animation, and more. Selecting “settings and options”
You can add a link to buttons for further functionality.
Step 25: Let’s change the images of our marketing agency website services. Simply, click on the image you want to change
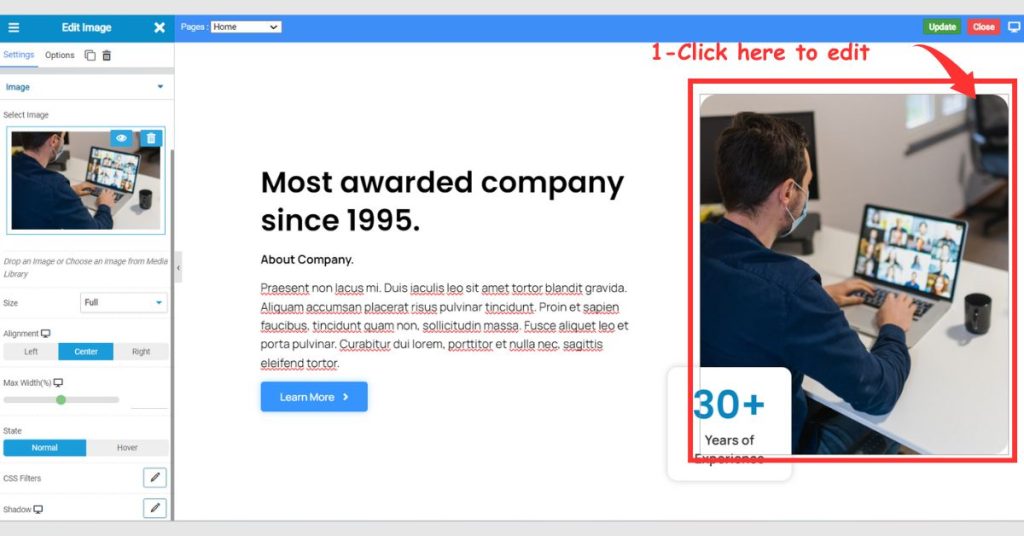
Step 26: Clicking on the image, will open a specific editing menu for that section.
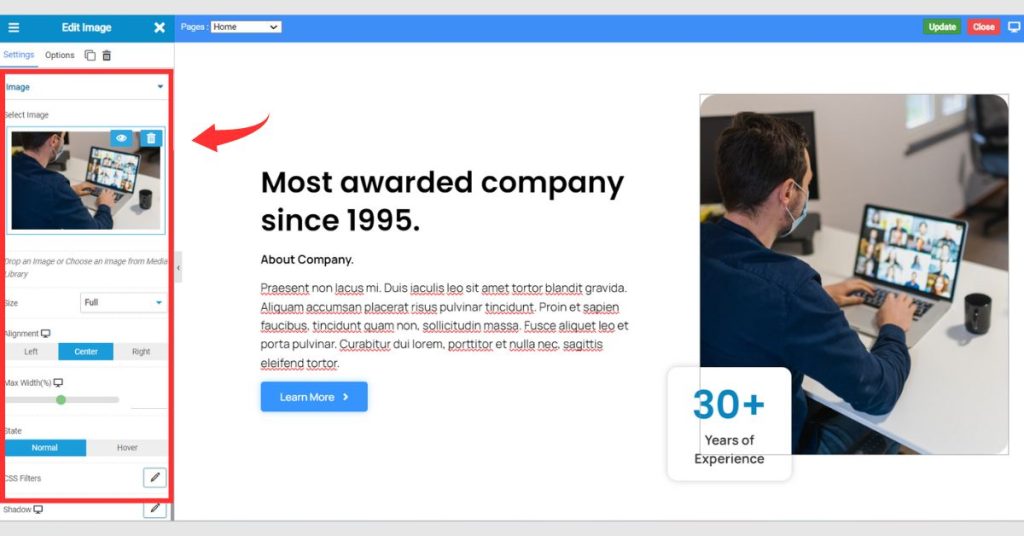
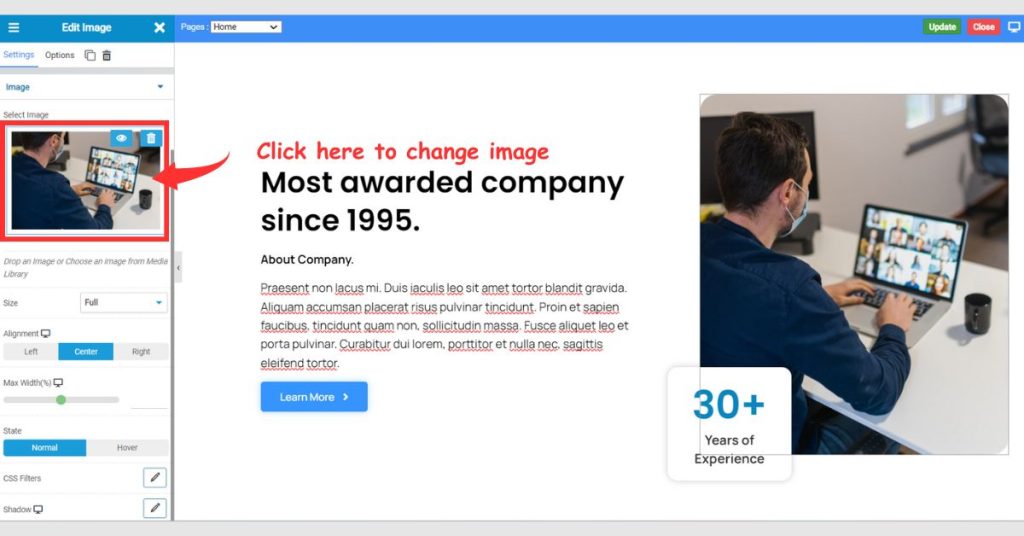
Step 27: To replace the current image, click the Choose Images” option.
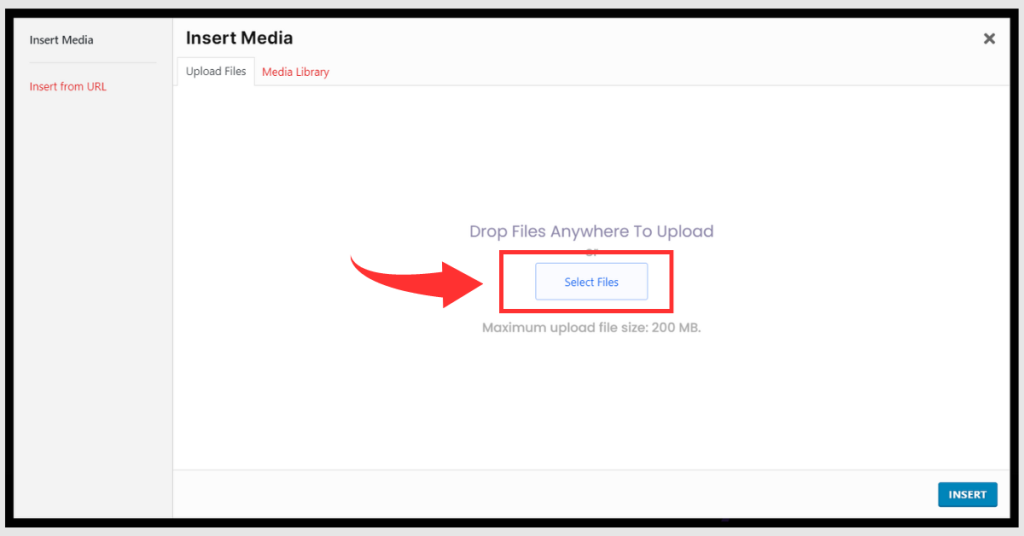
Step 28: To upload the image, click on Select Files. Alternatively, you can also upload pictures by using drag-and-drop options.
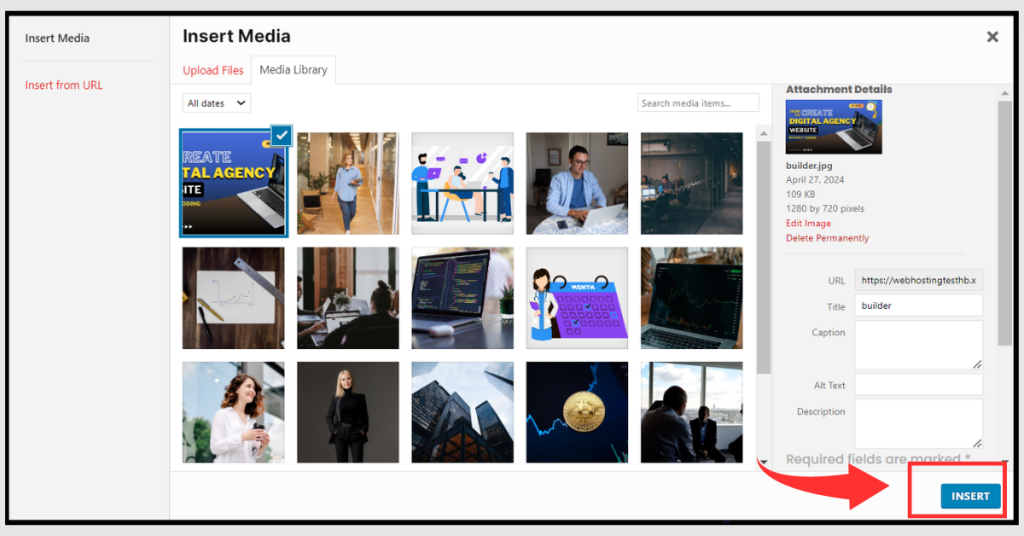
Step 29: Once you’ve uploaded the image, select it and click “Insert” to add it to your content
Step 30: Here’s how to edit our Digital Marketing Agency website’s working process: “How It Works.”
Step 31: Simply click on the specific element you want to edit.
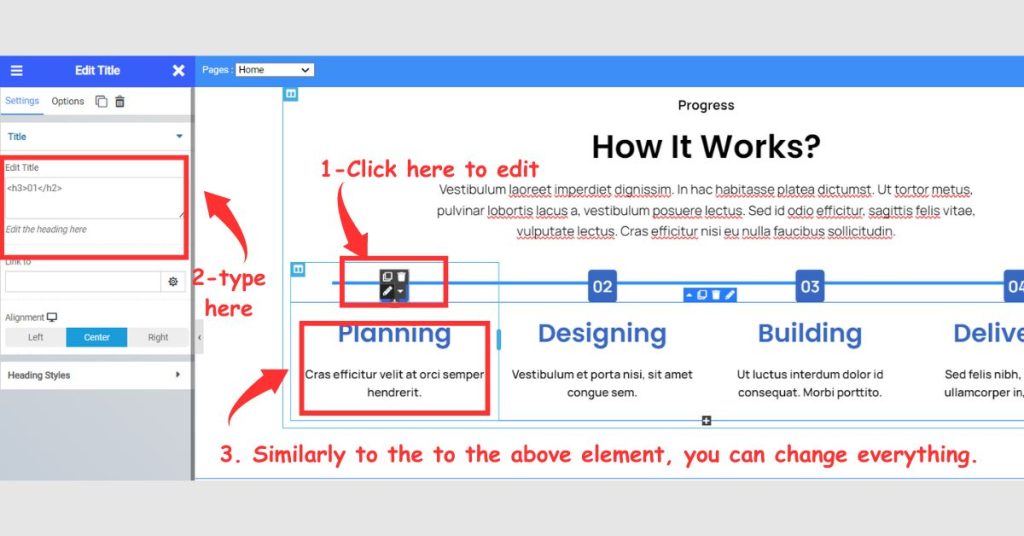
- Click on any element to open an editing menu in the sidebar. Via this menu, you can easily customize anything, including icons, alignment, headings, description text, buttons (style and other options), and more.
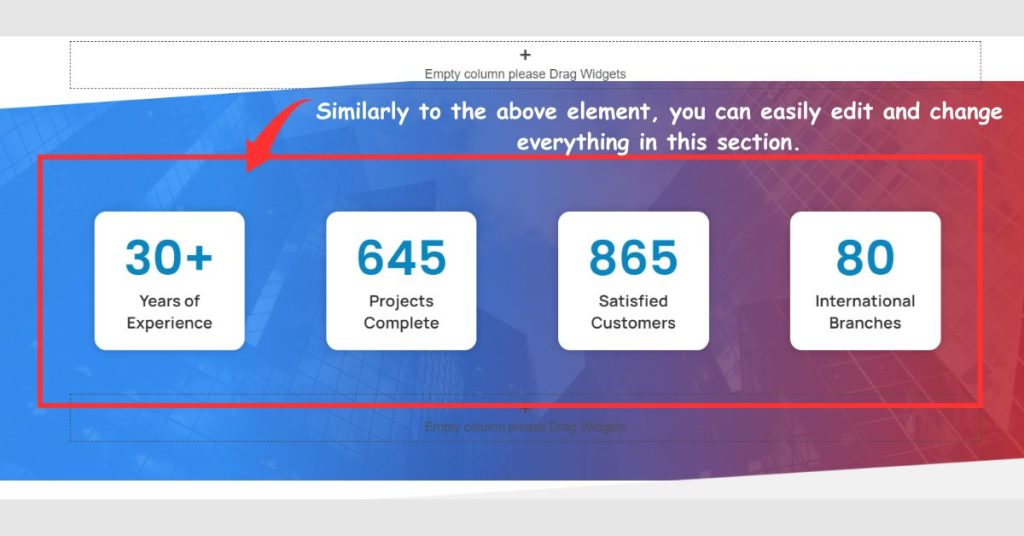
Step 32: As we explained above, similarly, you can edit the below section; you can easily customize anything, including icon size, numbers and text, alignment, headings, description text, and more.
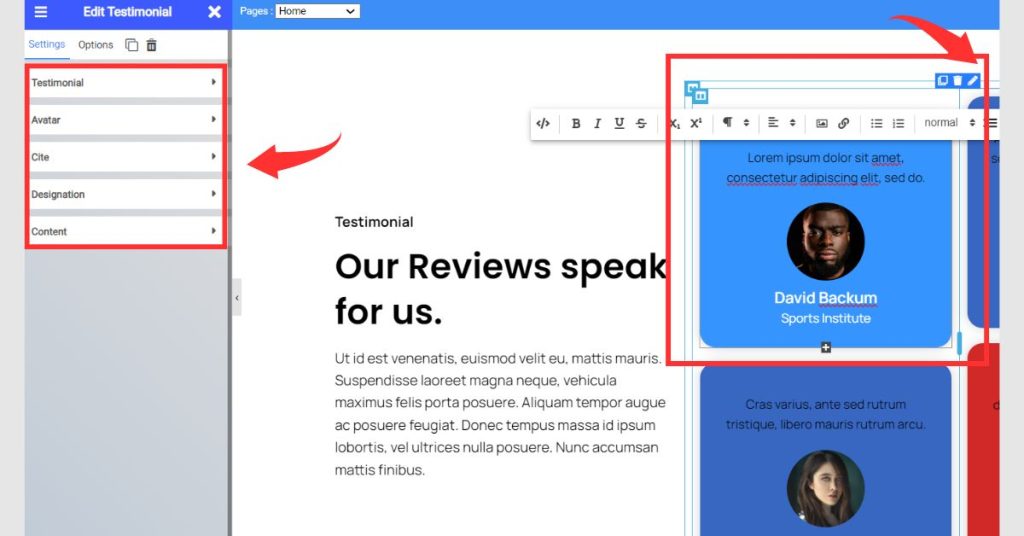
Step 33: How to Edit Our Digital Marketing Agency Website’s Testimonial Section Simply click on the specific element you want to edit. Once you click any element in this section, the editing menu will automatically open in the sidebar.
- You can edit anything in this section, including box style, testimonial, avatar, content, designation, background style, border style, font, color, text animation, and more. Selecting “settings and options”
Step 29: No matter what pages about us, contact us, or services you want to edit—text, description, or button—you can simply edit them directly by clicking on them.
Final Thoughts on How to Create a Digital Marketing Agency Website
And you have created your Digital Marketing Agency Website! With HostBet Website Builder, you’ve seen how quickly we can create an Agency website in just one hour. Without coding, we used the HostBet website builder and drag-and-drop functionality to create a website. Here, you’ll find over 853 responsive themes available at our website builder. you can establish a powerful online presence that attracts clients and fuels your digital marketing agency website’s success.